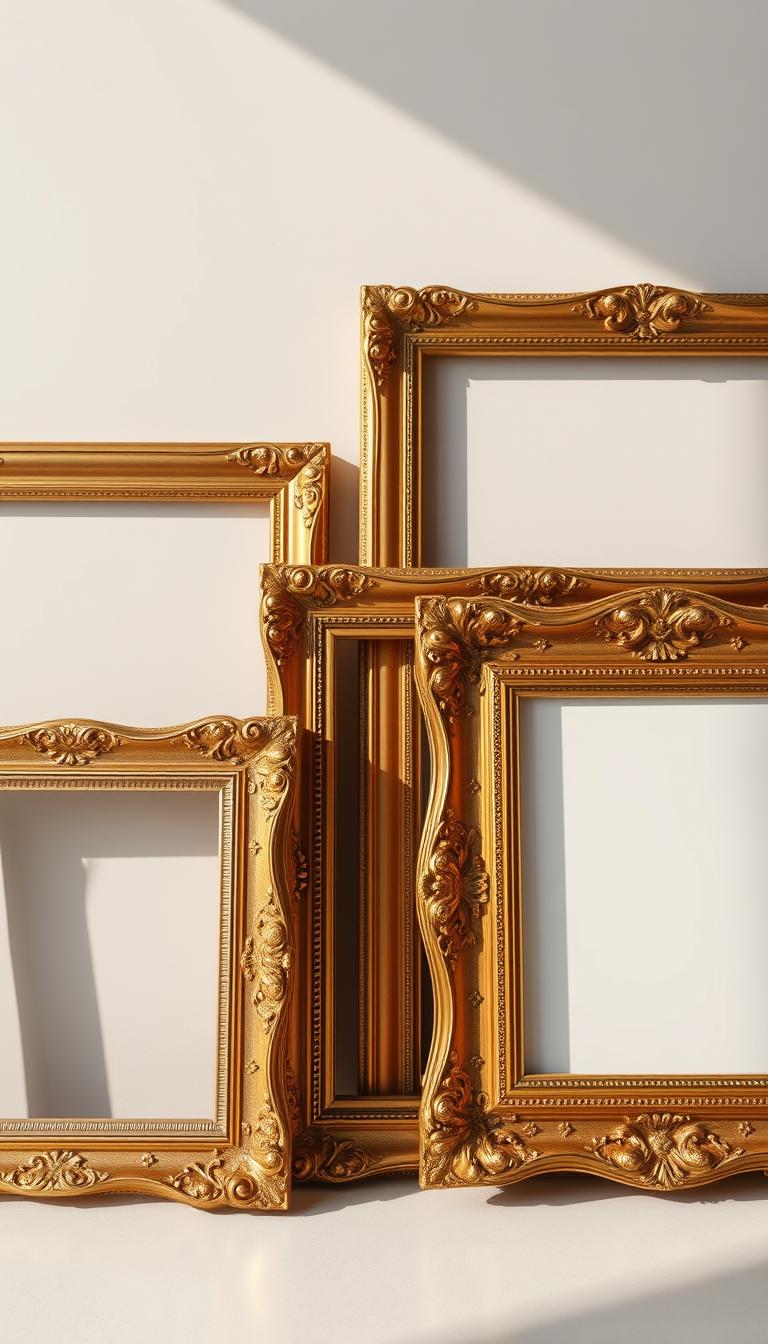
DIY Faux Vintage Frames (On A Budget)
This post contains affiliate links, meaning I may receive a small commission if you make a purchase through my links, at no extra cost to you.
Want to add elegance to your home without spending a lot? Transforming thrifted finds into unique pieces is a fun way to do it. It lets you express your creativity.
You can make posters and old frames into beautiful, one-of-a-kind artworks. They bring a vintage charm to any room. With a few simple steps, your frames will look like they came from an antique shop.
This project is not only budget-friendly. It also lets you unleash your creativity. You give new life to old, discarded items.
Key Takeaways
- Learn how to create custom vintage gold frames on a budget
- Discover how to give new life to old, thrifted frames and posters
- Follow a simple, step-by-step guide to achieve a unique, vintage look
- Unleash your creativity and add a personal touch to your home decor
- Create beautiful, one-of-a-kind artworks that add elegance to any room
Introduction to DIY Faux Vintage Frames
Creating faux vintage frames is easy with a few simple materials and some creativity. It’s not just about adding a personal touch to your home. It’s also about being sustainable and creative.
“I have been collecting old vintage frames for several years. One of my best tips is not to overlook ugly art. Some of the best frames will have an ugly print, making them cheap,” shares an experienced decorator from The Ponds Farmhouse. This tip shows how to find great deals on frames.
Why Choose Faux Vintage Frames?
Faux vintage frames add a unique charm to any room. They bring a sense of history and make your space feel more welcoming. Unlike modern frames, they have a special character.
Choosing faux vintage frames adds elegance to your home without the high cost of real antique frames. Black washing and applique molds can make your DIY project even more vintage.
Benefits of DIY Projects
DIY projects like faux vintage frames have many benefits. They let you express your creativity and learn new skills. Plus, they’re often cheaper than buying ready-made items.
- You can use old materials, reducing waste and supporting sustainability.
- DIY projects let you customize your creations to fit your style and needs.
- Creating something with your own hands is rewarding and fun.
Budget-Friendly Art Solutions
Making faux vintage frames is a great way to get a high-end look without spending a lot. By using affordable materials and being creative, you can make beautiful art that’s also budget-friendly.
The secret to affordable art is being resourceful and willing to try new things. You can use old frames, thrift store finds, or materials from discount stores. The possibilities are endless.
Materials Needed for Your DIY Project
To create your own faux vintage frames, you’ll need a few basic tools and materials. Having the right supplies makes your project fun and successful.
Basic Supplies You’ll Need
The core of your DIY faux vintage frames is the basic supplies. You’ll need:
- Old or new frames (thrift stores are a great source for affordable options)
- Wood glue for any necessary repairs or adjustments
- A hammer to tap things into place gently
- Sandpaper to smooth out rough edges or surfaces
As Confessions of a Serial Do-it-Yourselfer suggests, “You can find vintage picture frames for cheap at thrift stores…” This is a great way to start your project with a budget-friendly approach.
Optional Decorative Elements
To give your faux vintage frames an authentic look, consider adding some decorative elements. These can include:
- Rub ‘n Buff in Gold Leaf for a luxurious, aged appearance
- Distressing tools, such as a distressing hammer or sanding block, to create a worn look
- Paint in various colors to achieve the desired vintage effect
- Decorative items like ribbons, lace, or other embellishments to add a personal touch

As you gather your materials, remember that the beauty of DIY projects lies in their flexibility. Feel free to experiment with different supplies and techniques to make your faux vintage frames truly unique.
Step-by-Step Guide to Making Faux Vintage Frames
Want to make your home look great without spending a lot? Try making faux vintage frames with DIY picture framing supplies. This project lets you create frames that match your personal style and decor.
Preparing Your Materials
First, collect your picture frame mouldings and other needed items. You’ll need a sander to smooth out the surfaces and a joiner for precise cuts. Also, get wood glue, clamps, and a hammer.
Measure and cut your frame mouldings to the right size. Use a miter saw or a miter box for clean cuts. Sand the edges to get rid of splinters or rough spots.
Constructing the Frame
Start building the frame by applying wood glue to the mitered edges and clamping them together. Use corner clamps to make sure the corners are tight and the frame is square.
After the glue dries, nail the corners with frame nails. Tap them gently with a hammer. Make sure the frame is strong enough to hold the artwork or glass.
Distressing Techniques for Authenticity
To make your frame look vintage, distress it. Use a sander to smooth out the frame and remove excess glue or rough spots. Then, use a distressing tool or sandpaper to create worn edges and surfaces.
For a more real look, add faux rust or patina. Apply rust-colored stain or paint to the distressed areas and wipe off the extra. This will make your frame look beautifully aged.

| Material | Purpose | Tips |
|---|---|---|
| Picture Frame Mouldings | Frame Structure | Choose mouldings that fit your desired frame style |
| Sander | Smoothing Surfaces | Use progressively finer grits for a smooth finish |
| Joiner | Precise Cuts and Corners | Essential for professional-looking joints |
Painting and Finishing Your Frames
The transformation of your frames into authentic-looking vintage pieces begins with the painting and finishing process. This step is crucial as it not only enhances the aesthetic appeal of your DIY faux vintage frames but also gives them a unique character.
To start, you’ll need to decide on the color palette that will complement your home decor while giving your frames a vintage look. According to my friend Jennifer at Cottage on Bunker Hill, who shares her technique on How to Make Newer Picture Frames Look Vintage, choosing the right paint colors is essential.
Choosing the Right Paint Colors
When selecting paint colors, consider the overall ambiance you want to create in the room where your frames will be displayed. For a more authentic vintage look, opt for muted, earthy tones or soft pastels. You can also experiment with different shades to find the perfect match for your decor.
Here’s a simple guide to help you choose the right paint:
| Desired Look | Recommended Paint Color |
|---|---|
| Vintage Elegance | Soft Whites, Creams |
| Rustic Charm | Earthy Browns, Tans |
| Distressed Modern | Muted Grays, Blues |
Techniques for a Distressed Look
Achieving a distressed look can be done using various techniques. One popular method is to use sandpaper to gently wear away the paint in certain areas, revealing the underlying surface. You can also use a distressing tool or simply a damp cloth to create subtle, worn effects.

To further enhance the vintage appeal, consider using v-nails or other decorative elements during the assembly process. Additionally, having the right picture framing tools list can make a significant difference in the quality of your DIY project.
By carefully selecting your paint colors and applying the right distressing techniques, you can create beautiful, unique faux vintage frames that add character to any room. This approach not only helps in how to save money on picture framing but also allows you to personalize your decor.
Adding Glass or Artwork to Your Frames
Now that your frames are built and distressed, it’s time to add the final touches. This step is key. It not only protects your artwork but also boosts the look of your faux vintage frames.
Sourcing Affordable Artwork
Finding the right artwork is a fun, creative journey. You can use old posters, prints, or photos to make your frames unique. Etsy and eBay have many affordable art pieces that fit a vintage theme. Thrift stores and garage sales also offer unique finds at low prices.
As shown on neverskipbrunch.com, turning posters and thrifted frames into faux vintage paintings is a simple, creative DIY project. It saves money and adds a personal touch to your decor.
Types of Glass or Plexiglass
You can choose between glass and plexiglass to cover your artwork. Glass offers a classic look but is heavy and can break easily. Plexiglass is lighter, more durable, and perfect for DIY projects. To attach either, you’ll need L brackets and screws. A screwdriver is crucial for this job.
| Material | Durability | Weight | Cost |
|---|---|---|---|
| Glass | Prone to breakage | Heavy | Moderate |
| Plexiglass | Highly durable | Lightweight | Moderate to High |
To learn more about how to frame your art on a budget, check out online tutorials or DIY guides. They provide detailed, step-by-step instructions.

Creative Ways to Display Your Faux Vintage Frames
Creative display ideas can make your faux vintage frames a stunning centerpiece. The way you display them can greatly affect your room’s look. It makes your space feel more personal and inviting.
Think about your home’s style and theme when choosing how to display your frames. For a rustic vibe, use reclaimed wood or distressed finishes. For a modern look, sleek and simple displays are better.

Gallery Wall Ideas
Building a gallery wall is a great way to show off several faux vintage frames. Pick a theme or color scheme to link the frames. You can arrange them in a collage or a grid. A miter saw with an 80-tooth carbide saw blade helps with precise cuts for custom frames.
To make it more interesting, mix frame sizes and shapes. Adding mirrors, clocks, or other art can make your gallery wall more engaging.
Standalone Display Options
Displaying frames alone or in small groups is also a good option. You can place one frame on a mantel or a few on a large wall. A unique frame can grab more attention.
For a unified look, pick frames with similar colors or styles. This creates a flow and continuity. Playing with display heights and angles adds interest.
One homeowner said, “Add A Gallery Wall… I still love this wall in our powder room.” This shows how a well-chosen display can transform a room.
Customizing Your Faux Vintage Frames
To make your DIY faux vintage frames special, think about adding custom touches. This way, you can make them truly unique and show off your personal style.
Personalizing with Stencils and Decals
Stencils and decals are great for adding personal messages or designs to your frames. You can find many online or make your own with design software.
Tips for Using Stencils and Decals:
- Choose designs that match your frame’s style.
- Use a paint color that stands out against the frame.
- Apply a sealant to keep the design looking fresh.
Incorporating Mixed Media Elements
Mixed media can make your frames more interesting. Try using fabric, paper, or found objects for a unique look.
For instance, fabric can add a soft, textured feel. Paper cutouts can create a collage effect.
The Ponds Farmhouse
suggests using a vintage frame to highlight a Christmas wreath. This trick works for other decorations too.

| Element | Description | Effect |
|---|---|---|
| Fabric | Adds texture and softness | Creates a cozy, inviting atmosphere |
| Paper Cutouts | Adds intricate designs | Enhances visual interest |
| Found Objects | Adds unique, personal touches | Makes the frame truly one-of-a-kind |
Maintenance and Care for Your Frames
Keeping your faux vintage frames in top shape is easy. A few simple steps can help. They keep your DIY frames looking great for longer.
Keeping Your Frames Looking Fresh
To keep your frames looking vintage, keep them dust-free. Use a soft, dry cloth to wipe away dust. For detailed frames, a small, soft-bristled brush works well.
Avoid harsh chemicals or abrasive cleaners to protect your frames. For tough stains, dampen a cloth with water but don’t soak it.

Repair Tips for DIY Frames
DIY frames might need repairs over time. Use adhesive for loose joints or corners. For distressed finishes, touch up paint or varnish.
For bigger damage, like broken glass, replace it or reinforce the frame. You can also turn old frames into new items, like jewelry displays.
Good care and quick repairs keep your frames looking good for years. Regular maintenance and timely fixes are essential.
Conclusion and Inspiration for Future Projects
Now that you’ve made your own DIY faux vintage frames, it’s time to show them off. You can display your unique diy vintage framed art at home. You’ll know you made it on a budget, thanks to our guide.
Showcasing Your Creations
Share your creations online with friends and family. You can post pictures of your diy vintage framed art on social media. This way, you’ll connect with others who love handmade decor.
Exploring More DIY Home Decor
With your new skills, you’re ready for more DIY home decor projects. Think about repurposing old furniture or making decorative items from recycled materials. The possibilities are endless, and you’ll feel great about what you’ve accomplished.
Remember, creativity is key as you continue your DIY journey. With a little imagination, you can make any ordinary item special.
FAQ
What materials can I use to create a distressed look on my faux vintage frames?
You can use Rub ‘n Buff in gold leaf, black washing, or applique molds for a distressed look. Sandpaper can also help distress the frame.
What are the essential tools needed for DIY picture framing?
You’ll need a miter saw with an 80-tooth carbide saw blade, a sander, and a joiner. Also, v-nails, a mat cutter, a hammer, a screwdriver, and L brackets with screws are essential.
How can I make a modern frame look vintage?
Use distressing techniques like sanding, black washing, or Rub ‘n Buff in gold leaf. Adding applique molds can also give it a vintage look.
Where can I find affordable materials for my DIY faux vintage frames?
Look for affordable materials at thrift stores, home improvement stores, or online. Online retailers sell picture frame mouldings and DIY supplies.
Can I customize my faux vintage frames with stencils or decals?
Yes, you can add a personal touch with stencils or decals. Mixing media elements also makes your frames unique.
How do I maintain and care for my faux vintage frames?
Dust them regularly and avoid direct sunlight to keep them fresh. For damage, use wood glue and DIY supplies for repair.
What are some budget-friendly options for sourcing artwork for my faux vintage frames?
Find affordable artwork at thrift stores, online, or create your own. Prints or photographs are also good options.
Should I use glass or plexiglass for my faux vintage frames?
Both glass and plexiglass work for faux vintage frames. Glass offers a traditional look, while plexiglass is lighter and safer.